Weekly_Assignments :
- mill, solder and programming FabISP
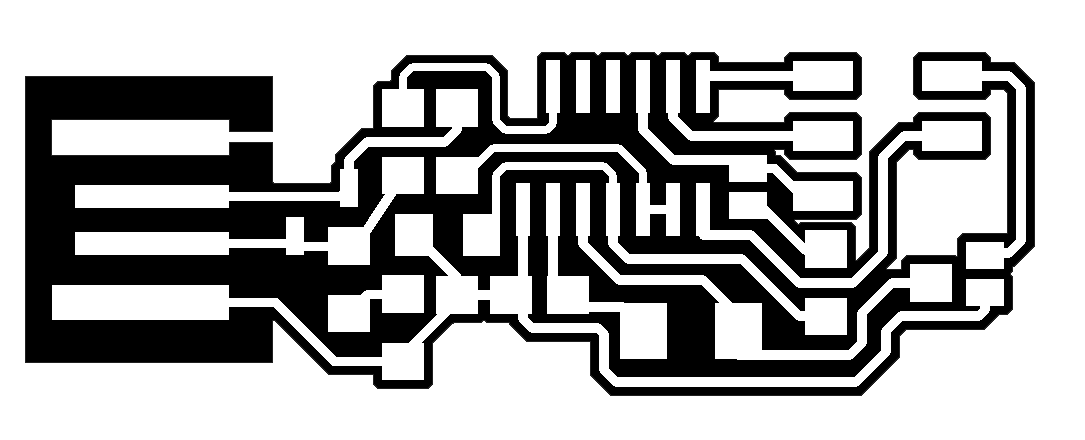
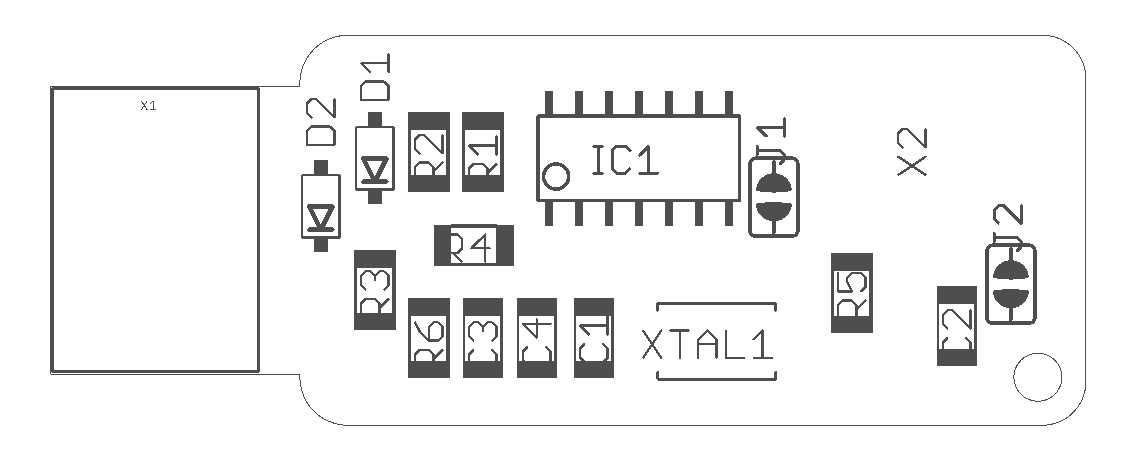
to mill fab isp key v 2.3
to mill with fabisp key version 2.3
using Fab Modules and Roland MDX-20 Modela.
I used :
- 1/64” end mills bit for milling the traces
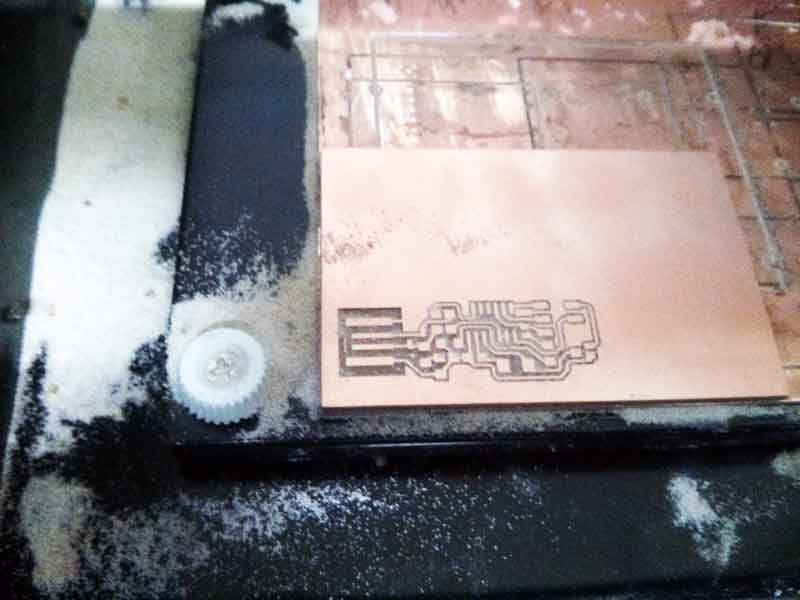
- 1/32” end mills for cut the fab isp key out of the “copper sheet”

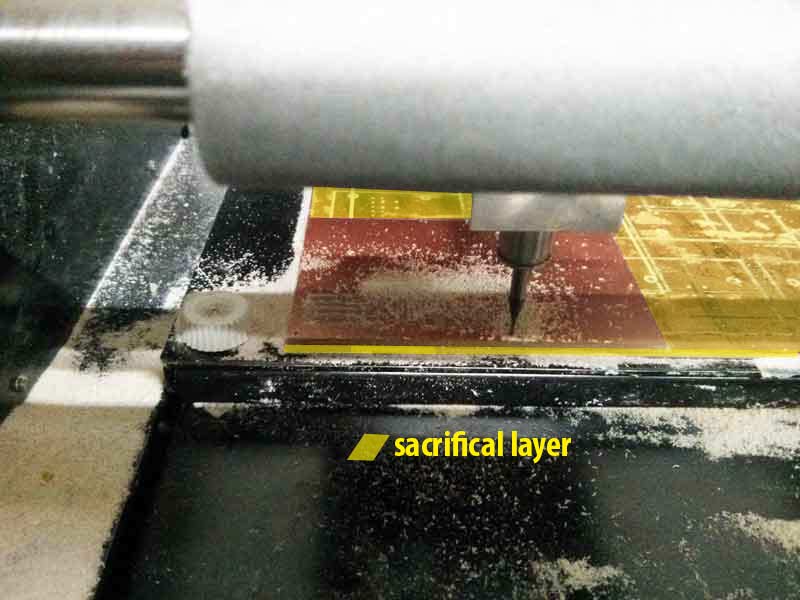
Useful to prevent a MDX-20 damage, is place a “sacrifical layer” on the bottom of the copper sheet
sacrifical layer material layer placed under the copper plate, sacrificial in case of an increased pressure of the drill tip
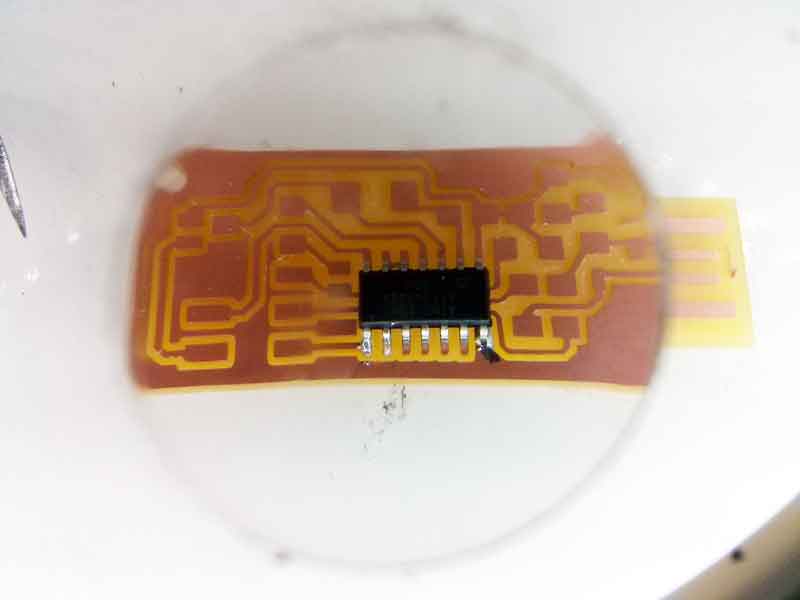
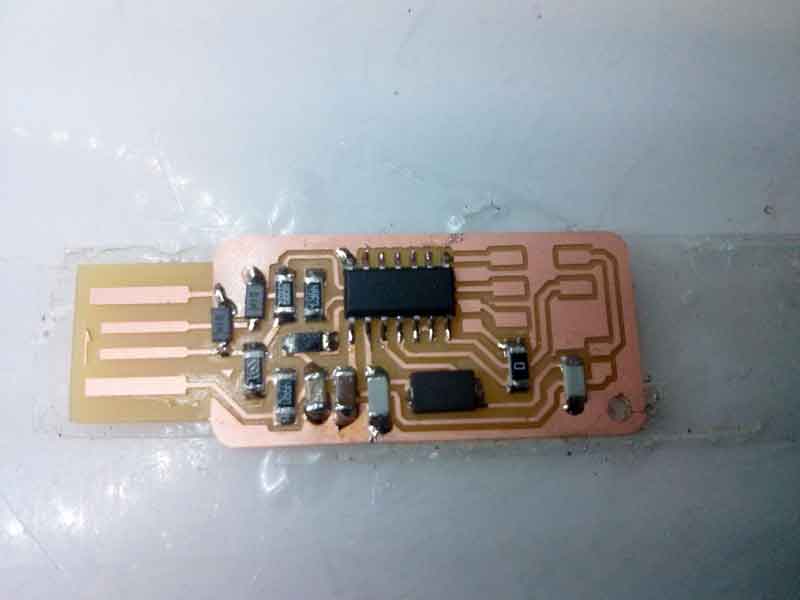
to solder
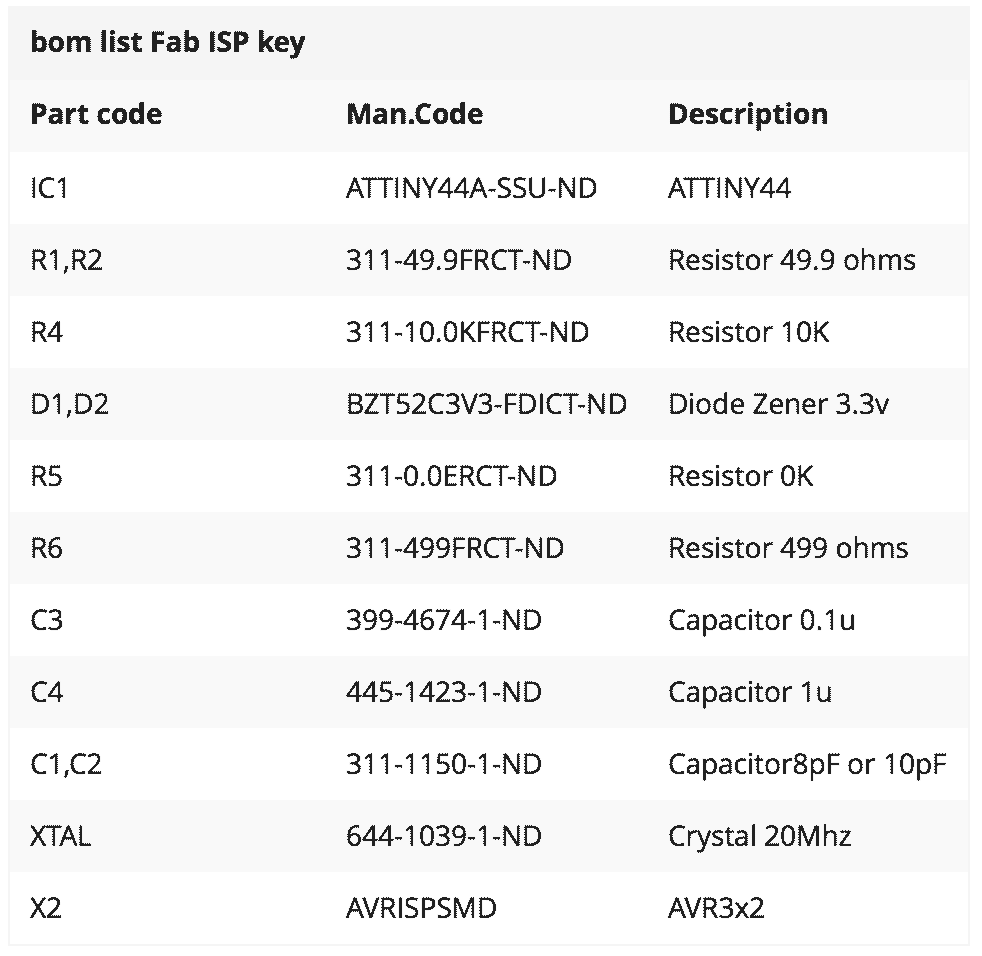
I start to understand the schematic plane of the board and I find on the web (last years classes) a good bill of materials. thanks to the “istructor tricks” it was very fast soldering components.
- heat the track with the tip of the welder
- add solder in track
- lock the component on the solder added
- weld pressing the opposite side of the component
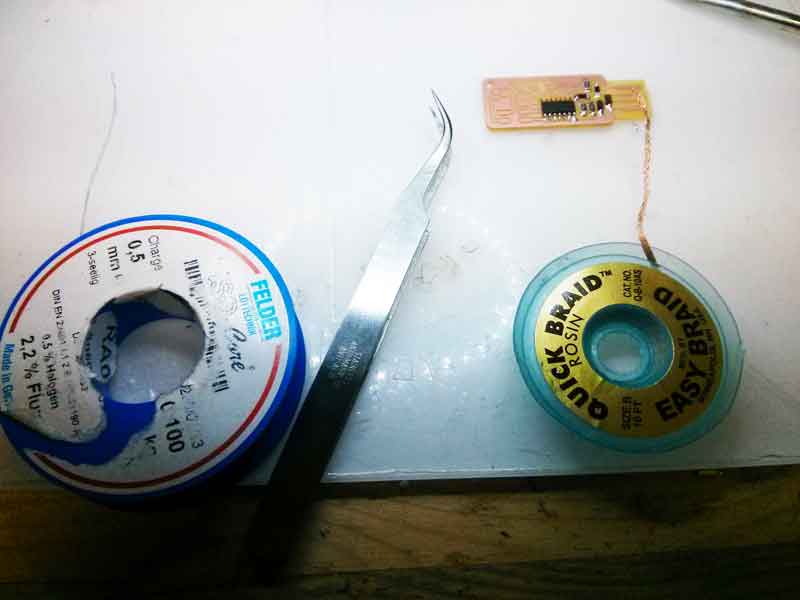
Useful tools
- tweezers (for take the component)
- copper braid (in case of extra tin)
- tin with flux (for precise and fast welds)
- biadhesive (to immobilize the board to the table)
- lamp (for not to become blind)
during the soldering, I found very annoying skip and serach in my phone these three images, so I decided to collect them and put them close, in a single screen. I think is more easy when you proceed with soldering. I created a table list of material in order by soldering (suggest)
original file by http://fab.cba.mit.edu
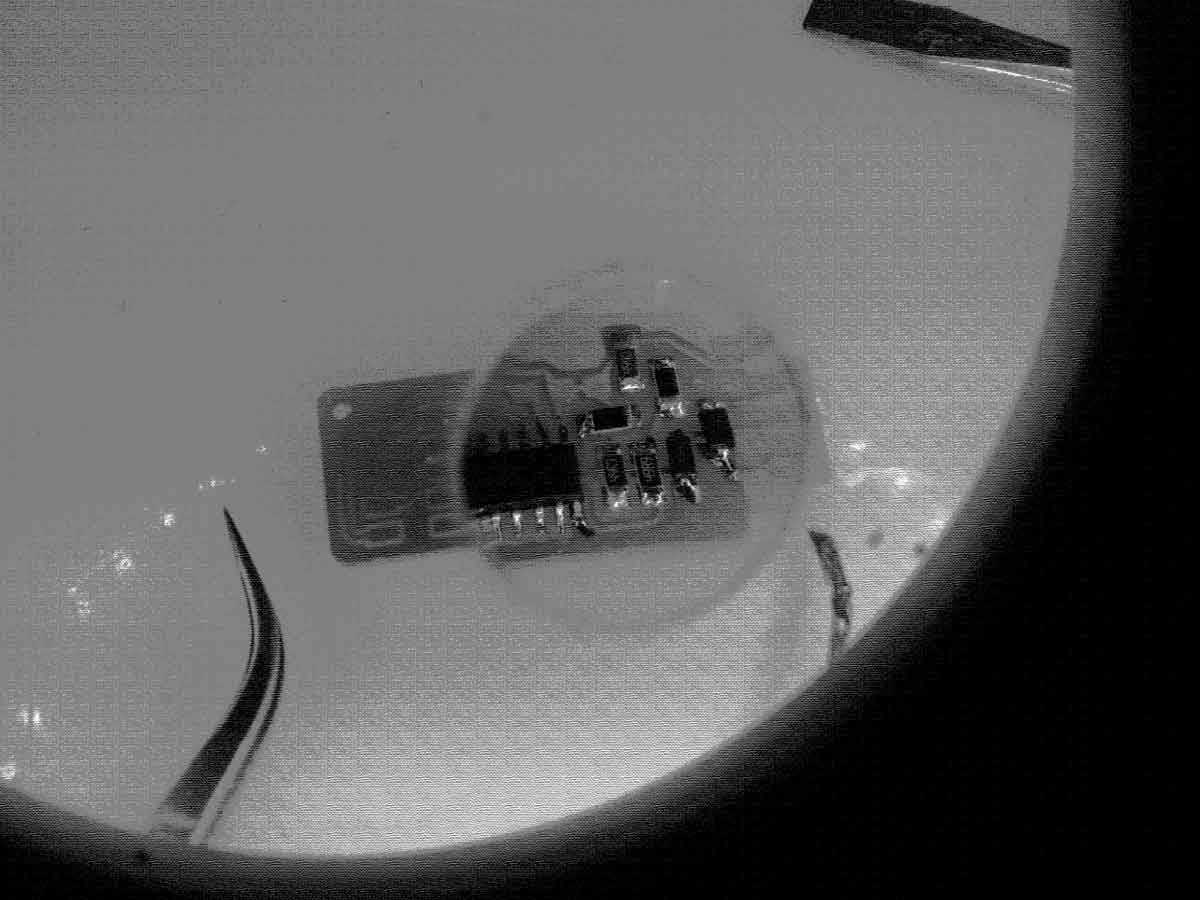
Final result without AVR3x2
firmware upload from arduino uno
- install avr software (for mac users) and download firmware
- set arduino uno as isp
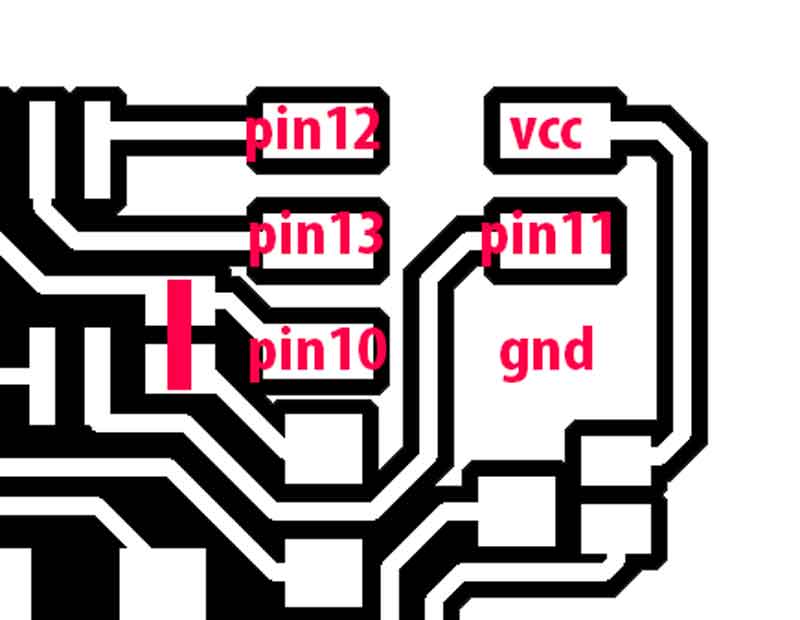
follow tutorial here to find the coresponding pin od arduino
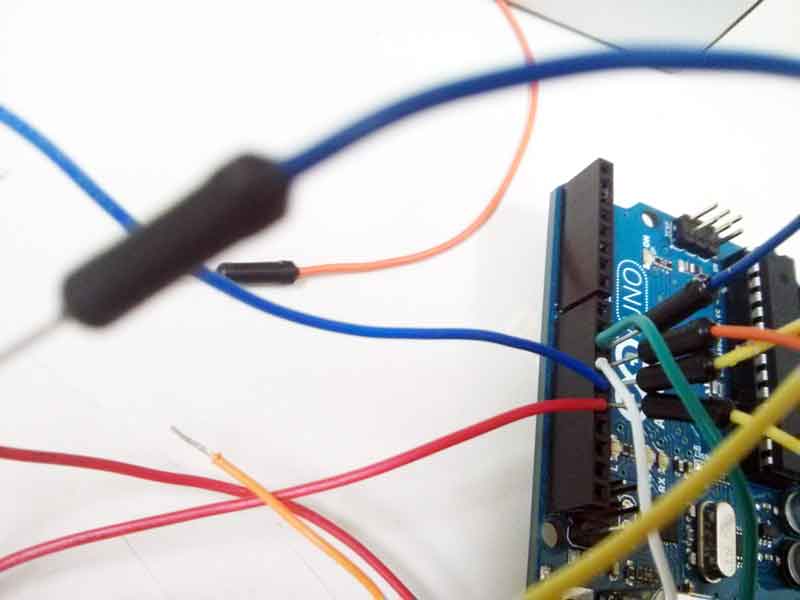
power fabisp through port usb and connect with arduino :
important Modify make file inside firmware folder and uncomment
- AVRDUDE = avrdude -c arduino -P /dev/cu.usbmodem1451 -p $(DEVICE) # edit this line for your programmer
go with terminal inside the firmware folder and:
- make clean
- make hex
- sudo make fuse
avrdude -c arduino -p attiny44 -U hfuse:w:0xDF:m -U lfuse:w:0xFF:m

avrdude: AVR device initialized and ready to accept instructions

Reading | ################################################## | 100% 0.00s

avrdude: Device signature = 0x1e9207
avrdude: reading input file "0xDF"
avrdude: writing hfuse (1 bytes):

Writing | ################################################## | 100% 0.00s

avrdude: 1 bytes of hfuse written
avrdude: verifying hfuse memory against 0xDF:
avrdude: load data hfuse data from input file 0xDF:
avrdude: input file 0xDF contains 1 bytes
avrdude: reading on-chip hfuse data:

Reading | ################################################## | 100% 0.00s

avrdude: verifying ...
avrdude: 1 bytes of hfuse verified
avrdude: reading input file "0xFF"
avrdude: writing lfuse (1 bytes):

Writing | ################################################## | 100% 0.00s

avrdude: 1 bytes of lfuse written
avrdude: verifying lfuse memory against 0xFF:
avrdude: load data lfuse data from input file 0xFF:
avrdude: input file 0xFF contains 1 bytes
avrdude: reading on-chip lfuse data:

Reading | ################################################## | 100% 0.00s

avrdude: verifying ...
avrdude: 1 bytes of lfuse verified

avrdude: safemode: Fuses OK (H:FF, E:DF, L:FF)

avrdude done. Thank you.
- sudo make program
avrdude -c arduino -p attiny44 -U flash:w:main.hex:i

avrdude: AVR device initialized and ready to accept instructions

Reading | ################################################## | 100% 0.00s

avrdude: Device signature = 0x1e9207
avrdude: NOTE: "flash" memory has been specified, an erase cycle will be performed
To disable this feature, specify the -D option.
avrdude: erasing chip
avrdude: reading input file "main.hex"
avrdude: writing flash (2002 bytes):

Writing | ################################################## | 100% 1.98s

avrdude: 2002 bytes of flash written
avrdude: verifying flash memory against main.hex:
avrdude: load data flash data from input file main.hex:
avrdude: input file main.hex contains 2002 bytes
avrdude: reading on-chip flash data:

Reading | ################################################## | 100% 2.37s

avrdude: verifying ...
avrdude: 2002 bytes of flash verified

avrdude: safemode: Fuses OK (H:FF, E:DF, L:FF)

avrdude done. Thank you.

avrdude -c usbtiny -p attiny44 -U hfuse:w:0xDF:m -U lfuse:w:0xFF:m

avrdude: AVR device initialized and ready to accept instructions

Reading | ################################################## | 100% 0.00s

avrdude: Device signature = 0x1e9207
avrdude: reading input file "0xDF"
avrdude: writing hfuse (1 bytes):

Writing | ################################################## | 100% 0.00s

avrdude: 1 bytes of hfuse written
avrdude: verifying hfuse memory against 0xDF:
avrdude: load data hfuse data from input file 0xDF:
avrdude: input file 0xDF contains 1 bytes
avrdude: reading on-chip hfuse data:

Reading | ################################################## | 100% 0.00s

avrdude: verifying ...
avrdude: 1 bytes of hfuse verified
avrdude: reading input file "0xFF"
avrdude: writing lfuse (1 bytes):

Writing | ################################################## | 100% 0.00s

avrdude: 1 bytes of lfuse written
avrdude: verifying lfuse memory against 0xFF:
avrdude: load data lfuse data from input file 0xFF:
avrdude: input file 0xFF contains 1 bytes
avrdude: reading on-chip lfuse data:

Reading | ################################################## | 100% 0.00s

avrdude: verifying ...
avrdude: 1 bytes of lfuse verified

avrdude: safemode: Fuses OK (H:FF, E:DF, L:FF)

avrdude done. Thank you.