Weekly_Assignments :
- write an application that interfaces with an input &/or output device
#####Useful links:
#####Materials
- ######ESP8266
- ######servo+RGB board
- ######micro servo
- ######RGB LED
#What I want
introduction
The idea was to create a javascript app called via wifi-ip address, running directly on the memory of the esp module and interfaced with the RGB-Servo board executing the color changing and the servo rotation.
What I did
###ESP01
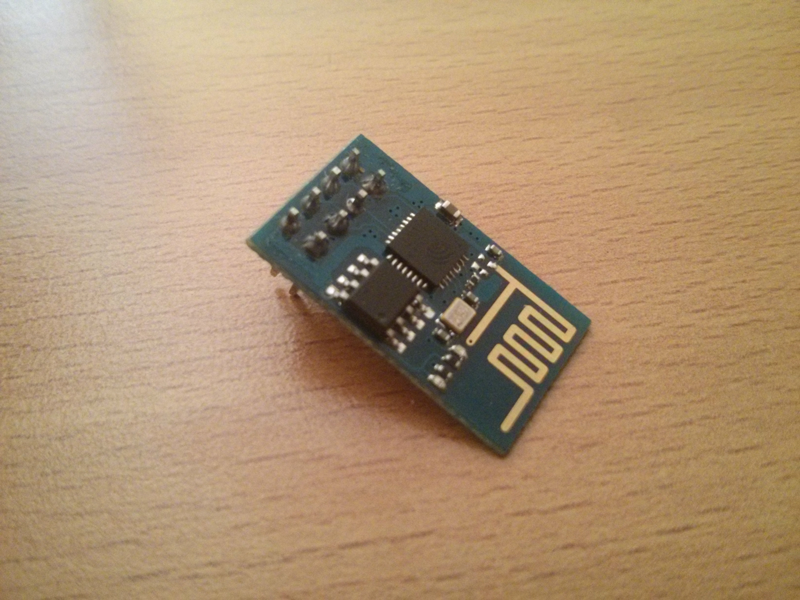
At the beginning I have used ESP01 NodeMcu 0.9.4 build 20141230 powered by Lua 5.1.4 but when I started the server from the ip address and recalled my index.html (servo_rgb.html) page with jquery.min.js (to control the operation of the buttons) it didn’t give to any response. I started to investigate why this happend and I discovered that the memory inside ESP01 is insufficent to “solve” (or charging) jquery.min.js !
error code:
c_��RS�fJS�f
S�f��C�NodeMcu 0.9.4 build 20141230  powered by Lua 5.1.4
name:init.lua, size:	3016
name:jquery.min.js, size:	84319
name:script1.lua, size:	876
name:servo_rgb.html, size:	1299
> path /jquery.min.js
Sending jquery.min.js
File is open
path /jquery.min.js
Sending jquery.min.js
File is open

PORT CLOSED
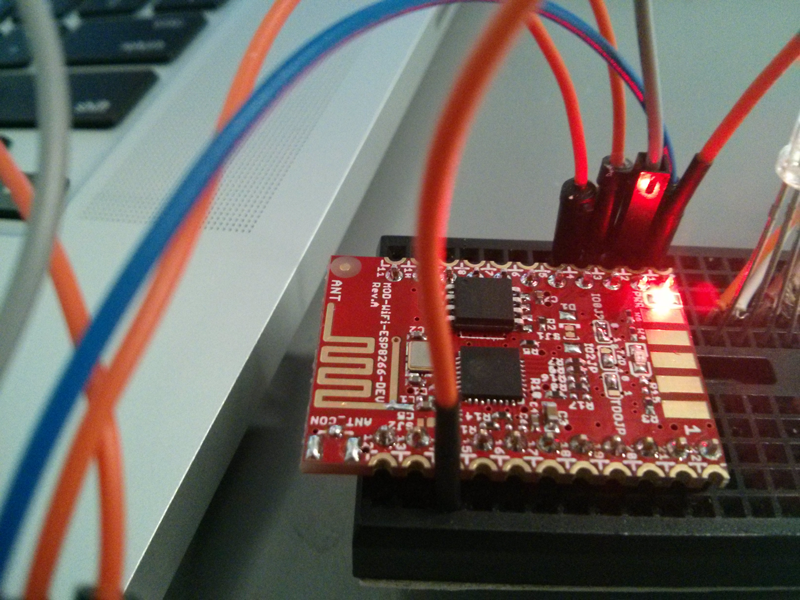
###ESP8266 rev A (olimex)

In the second attempt I used ESP8266 revA by olimex - This time, the mcu is way more powerful, since it has a 2mb capacity and I can upload all, without errors.
In github I have find a good code by marcoskirsch for start to undestand better the lua setting of esp8266, and I start to work above this
	local wifiConfig = {}

	-- wifi.STATION         -- station: join a WiFi network
	-- wifi.AP              -- access point: create a WiFi network
	-- wifi.STATIONAP  -- both station and access point
	wifiConfig.mode = wifi.STATIONAP  -- both station and access point

	wifiConfig.accessPointConfig = {}
	wifiConfig.accessPointConfig.ssid = "xxxxx"   -- Name of the SSID you want to create
	wifiConfig.accessPointConfig.pwd = "xxxxxx"    -- WiFi password - at least 8 characters

	wifiConfig.stationPointConfig = {}
	wifiConfig.stationPointConfig.ssid = "YYYYYYY"    -- Name of the WiFi network you want to join
	wifiConfig.stationPointConfig.pwd =  "YYYYYYY"            -- Password for the WiFi network

	-- Tell the chip to connect to the access point

	wifi.setmode(wifiConfig.mode)
	print('set (mode='..wifi.getmode()..')')
	print('MAC: ',wifi.sta.getmac())
	print('chip: ',node.chipid())
	print('heap: ',node.heap())

	wifi.ap.config(wifiConfig.accessPointConfig)
	wifi.sta.config(wifiConfig.stationPointConfig.ssid, wifiConfig.stationPointConfig.pwd)
	wifiConfig = nil
	collectgarbage()

	-- End WiFi configuration
I set the config mode to wifi.STATIONAP, with this configuration your ESP connect to your wifi-network and create his own SSID , so you can connect direct or over your existing network.
A problem is that I’m unable to start http-server over the STATIONAP (it is called also SAP = software access point) but if I give manually (via FTDI) the command:
> dofile("httpserver.lc")(90)
the server starts normally, so I decided to modify the code to give this command after a delay from the power on.
-- tmr.alarm(0, 10000, 1, function()
-- 	local ip = wifi.sta.getip()
-- 	dofile("httpserver.lua")(80)
-- end)
OK ! the server HTTP is UP ! on internet via my router and local connect direct by is own network! great succes!
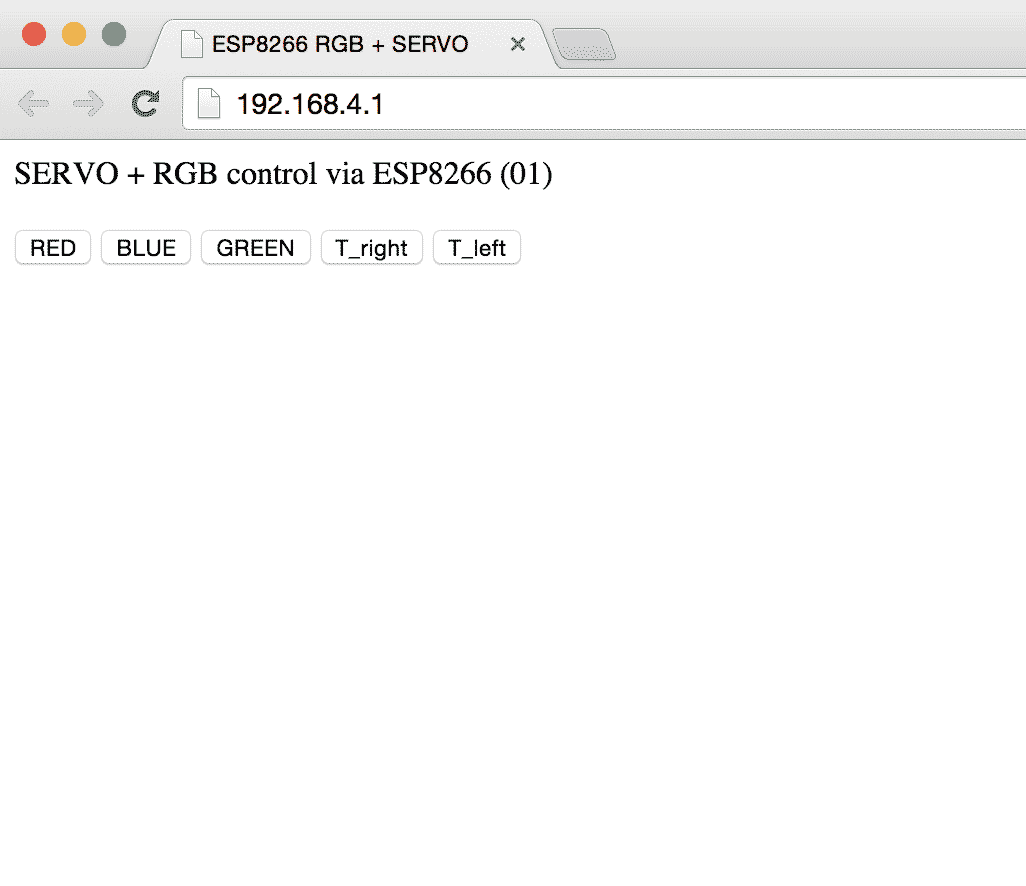
APP JS
Now I must write some code in javascript and HTML, to put inside a index.html page, served by ESP8266. In this page I can command servo motor and led rbg, using button.
I start to write the code using jquery.min.js but…
The library is too slow to have a response on http server over the ESP8266! So my instructor (Fiore Basile) suggested me to remove the jquery.min.js library, because it is much bigger than what I need for my opertions. Basically, it is unuseful for me. I removed the call to the jquery file from index, and replaced it including the javascript code directly in the page.
	<script src="jquery.min.js"></script>
	<script type="text/javascript">
			$(".rgb_red").click(function(){
				command("led", "255,0,0");
and I replaced it with :
		     function sleep(milliseconds){
		        var start = new Date().getTime();
		        for (var i = 0; i < 1e7; i++)
		        {
		           if ((new Date().getTime() - start) > milliseconds)
		           {
		              break;
		           }
		        }
		     }

	     	    document.getElementById("label").innerHTML = '';

		     document.getElementById('rgb_red').addEventListener("click", function(){
					command("led", "255,0,0");
WOW! right now I have an http server up on a small ESP8266 (programmed in LUA), and a index.html (write in javascript-html) but I still miss something……hhehehe the C code for the ATTINY !
#Breakout board v0.3 (servo+rgb+esp8266)
Modifying Neil’s sketch “Hello Echo” I made the two rx and tx pins by olimex interface and I connected the rx and tx pins by olimex to the relative reception and trasmission pins on my servo rgb board, that I had predisposed for this purpose.
I define in-out pin
#define serial_port PORTB
#define serial_direction DDRB
#define serial_pins PINB
#define serial_pin_in (1 << PB0)
#define serial_pin_out (1 << PB1)
and servo and rgb led pin
#define servo_port PORTA
#define servo_direction DDRA
#define servo_pin (1<<PA6)

#define red_led_port PORTA
#define red_led_direction DDRA
#define red (1 << PA3)

#define green_led_port PORTA
#define green_led_direction DDRA
#define green (1 << PA2)

#define blue_led_port PORTA
#define blue_led_direction DDRA
#define blue (1 << PA1)
after “get char” and “put char” neil’s code.. I declare “accendiled” (set led on) and “muoviservo” (move servo) function,
“accendiled” (set led on):
- set a variable to command LedRGB (0,0,0)
“muoviservo” (move servo):
-
moltiply a value for 100 and add 500 for set the position of servo motor
  void accendiLed(int r, int g, int b){


      // /put_string(&serial_port, serial_pin_out, "Accendi led");

      if (r == 0) {
          set(red_led_port,red);
      } else {
   		clear(red_led_port,red);
      }
      if (g == 0) {
          set(green_led_port,green);
      } else {
          clear(green_led_port,green);
      }
      if (b == 0) {
          set(blue_led_port,blue);
      } else {
          clear(blue_led_port,blue);
      }
  }

  void muoviServo(int gradi){

      put_char(&serial_port, serial_pin_out, 'A');
      OCR1A = 500+(100*gradi);
      position_delay();
  }
in the end I set the variable “doCommand”
- if the first character read is 0 the code enter inside the accendiLed fuction, and I set 4 IF for the second charater read:
00 = off 01 = red (255,0,0) 02 = green (0,255,0) 03 = blue (0,0,255)
- with the first character read is 1 the code enter inside the muoviservo fuction, and I set a second charather variable value ( 1 to 9 )
11 = 500+(1001) corresponding to 180 counterclockwise 19 = 500+(1009) corresponding to 180 clockwise
(for now I want test only this 2 servo value by the javascript app, but the code can turn at more angle)
void doCommand(char cmd, char param){
if (cmd == '0'){
int p = atoi(¶m);
//led
if (p==0) accendiLed(0,0,0);
if (p==1) accendiLed(255,0,0);
if (p==2) accendiLed(0,255,0);
if (p==3) accendiLed(0,0,255);
}
if (cmd == '1'){
int p = atoi(¶m);
muoviServo(p);
// if (param == 0){
// muoviServo(0);
// } else {
// muoviServo(1);
// }
}
}
inside the
int main(void) {
I set the clock divider, and initialize the servo phase and frequency, frequecy in the case of the micro servo is 20 ms that corresponding at ICR1 = 20000 in order to prevent some strange code passed by TX from ESP8266 I add a condition for execute the code only if the first character is “#”
   index = 0;
   put_string(&serial_port, serial_pin_out, "Init.");
   while (1) {
      get_char(&serial_pins, serial_pin_in, &chr);
      if (chr=='\n'){
	      char t='t';
	      put_char(&serial_pins, serial_pin_out, t);
      }
      if (chr=='#') {
	      index=0;
	      get_char(&serial_pins, serial_pin_in, &chr);
              cmd = chr;
	      get_char(&serial_pins, serial_pin_in, &chr);
	      doCommand(cmd, chr);
Thanks to the board that I built in output device I am able to power the wifi module directly via the 3.7V lipo battery (test!).
##Esp8266 app + DEMO
#Conclusion
I found very interesting sperimenting with this way of writing apps, specially because of applying it on a small device as mine. It wasn’t very hard since I used the samples of the different github distributions: modifying them it is quite easy to get to the result. Nonetheless I would have liked to write an app using nodejs and I think I will have to develop it for my final project.
I found the main difficulties in the debug phase of the Esp, but I solved them simply changing the module and getting a more powerfull one, even if this is not the way I like the most. The difference between the two pieces is only a couple of dollars and I think that a couple of dollars are really worth it.
#Source File